|
This week I made an experimental baseball hat cake for my cousin's birthday. I photographed the progress mostly to show you but also so I could remember how to do it again. It took a lot more work than I anticipated and reminded me just how much I dislike fondant. However, I am really glad I tried it and hope that it will be easier in the future. 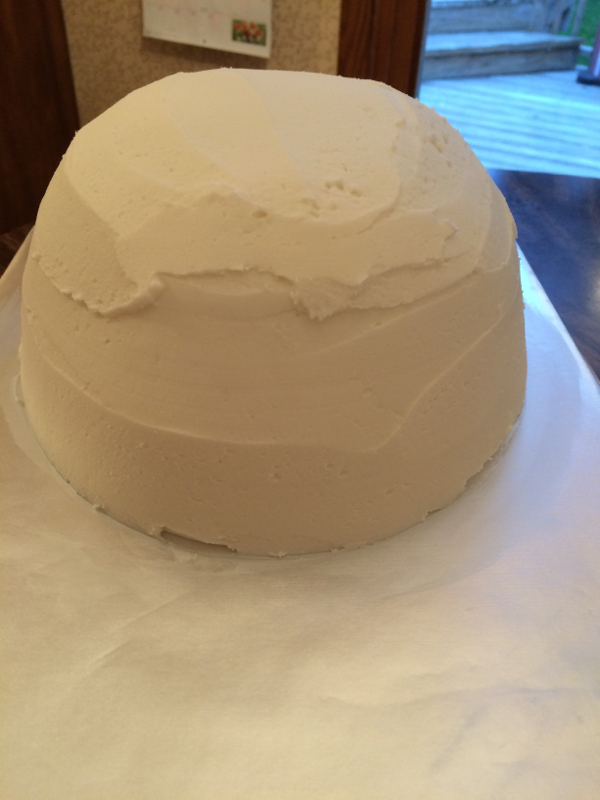 1. Bake a cake in an oven safe bowl. I baked a cake in a smaller bowl but I thought it was too small so I made another one in a slightly bigger bowl. Note: make it in the smaller ball. With the addition of frosting and fondant, everything you had planned will need to increase in size. This adds on time to your baking adventure. Frost the cake like normal. Bonus, it doesn't have to be perfectly smooth because it will be covered in fondant! 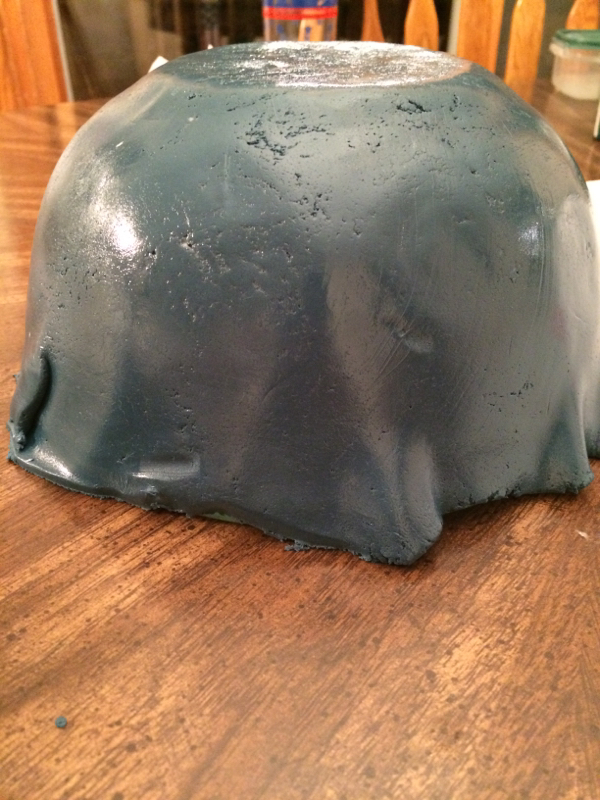 2. Color your fondant the right color. This should be done before you frost the cake. Getting this blue took so much food coloring I couldn't believe it. Next time, I am going to use spoonfuls of coloring instead of toothpicks. Having this much food coloring apparently dries out your fondant and it may separate. I made an 8pm Micheal's run just in case I had to redo it. Thankfully it stuck together for this cake! If you need to moisten your fondant, add shortening. It sounds nasty but it's the only way I can get it to work. If anyone has other ideas, I am all ears! Another tip is to cover what you used to bake the cake to make sure you have enough fondant. You don't want to put it on the cake because it will get frosting on it and you'll have to scrape it all off or start over. 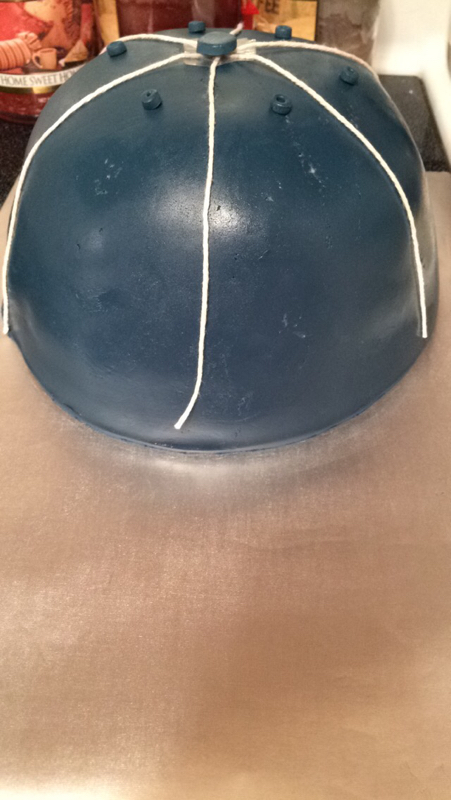 3. Cover your cake with fondant and cross your fingers that it is smooth. The problem I always have is that I don't make the fondant thin enough. Although it was thin enough this time, it was so dry that I cracked a little. When that happens you can smooth it out with shortening. Are you sensing a theme here? For the little rounds on top, I used a #10 round tip and a #1 tip to make a doughnut shape and stuck them on with frosting. I also taped string in the position I wanted it to appear on the hat so I had a guide to trace a straight line. 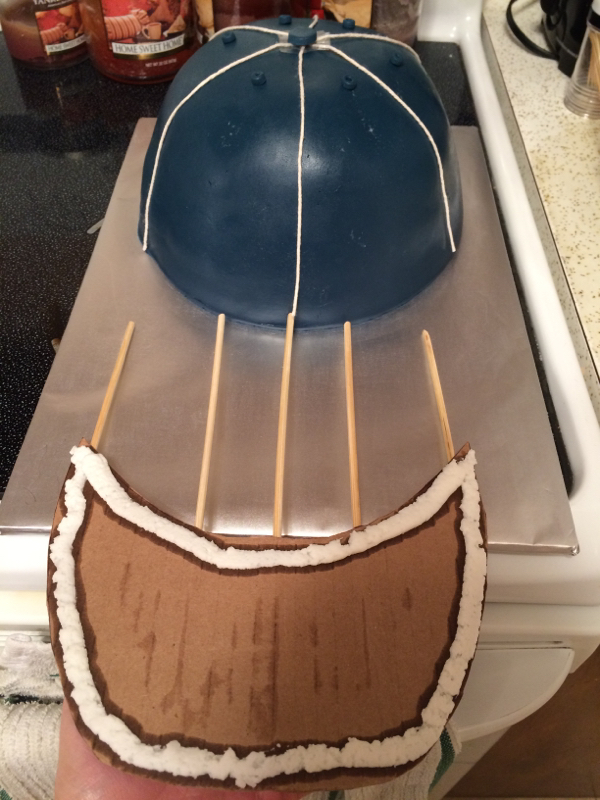 4. Before you even start on the cake, I would recommend creating a template for the brim. This is made out of cardboard with dowels stuck into the slots inside. I bent it in the middle to get the shape of the brim correct. The men in my life would not settle for a flat brimmed hat! I outlined the brim in frosting so the fondant would have something to stick to. 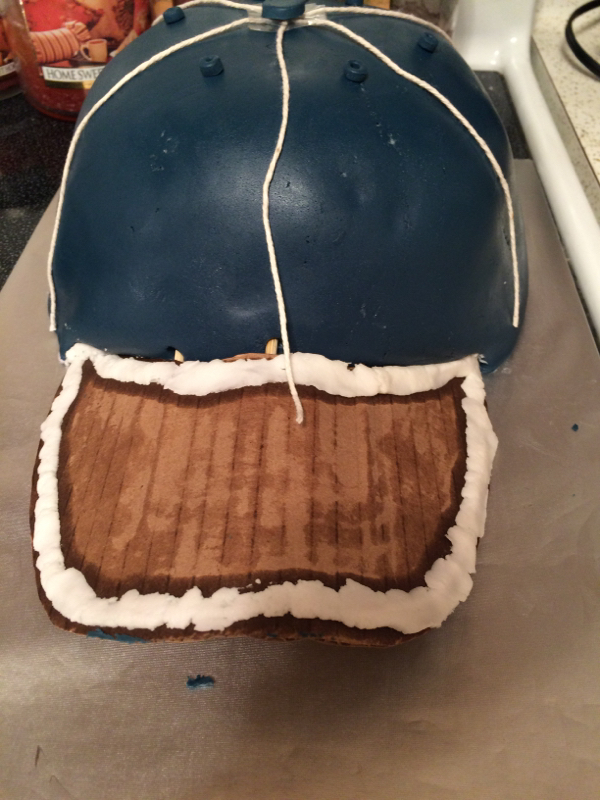 5. Shove the brim into the cake. The dowels should go about halfway through and should keep the shape of the brim. To begin, I covered it in fondant but when I shoved it in, it got wrinkly. Next time, I will stick just the cardboard into the cake. 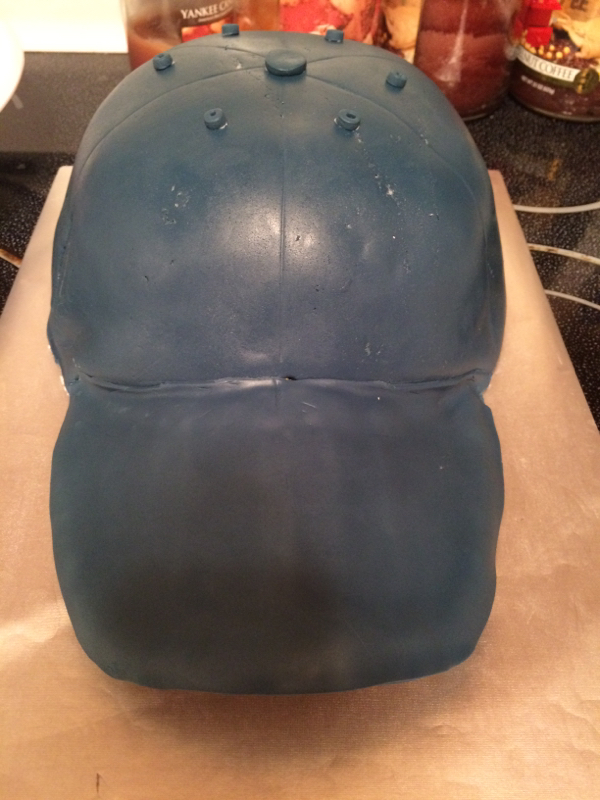 6. For the brim, I added a bit of gum paste to the fondant. This allows it to stiffen a bit to hold the shape. In order to cut the proper shape, I recommend creating a stencil. At this point, I used a fancy rolling tool to follow the string and create the straight lines. You can also use a knife to create the indent of the line. 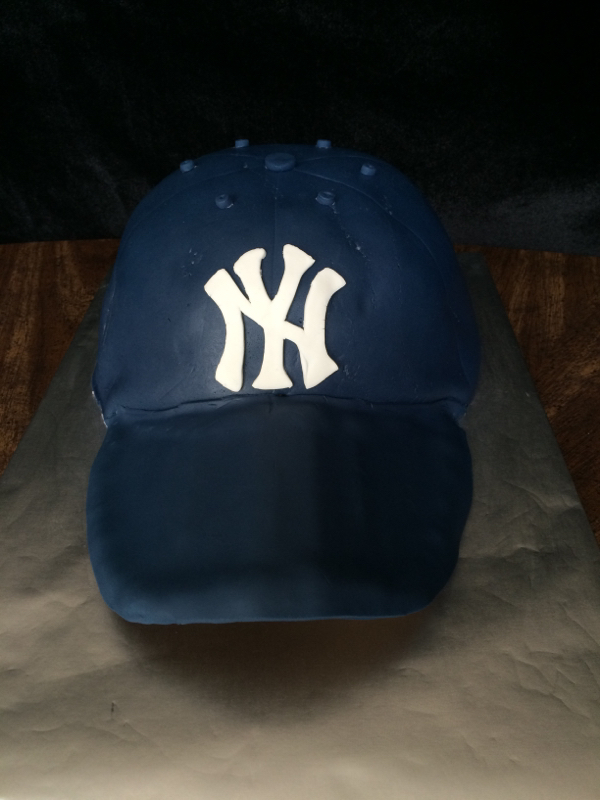 7. The logo was cut out of a stencil too. Just use gum glue to stick it on and it is complete!
1 Comment
|
AuthorI am Lindsay, the owner of Lb Cakes, LLC. I will be updating my blog regarding my adventures of being a young entrepreneur in the bakery business. 
Archives
December 2016
Categories
All
|
 RSS Feed